Top tips for a successful underfloor heating installation
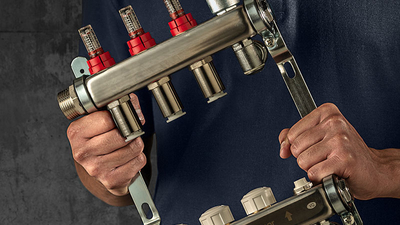
Without a doubt, the popularity of underfloor heating (UFH) is rising. With more and more developers specifying this heating technology in their new builds, along with homeowners looking to retrofit it into their homes, it pays to be aware of the best practices around underfloor heating installation.
In this blog, we’ll share some crucial top tips from our underfloor heating experts that can help simplify your next project, from laying insulation and positioning the manifold to pressure testing and more.
1. Prepare the floor base with the appropriate insulation
The first step in the underfloor heating installation process is to ensure that the appropriate amount of insulation is laid over the base of the floor. Insulation is key for ensuring that the system runs effectively and there is no heat loss.
For new builds, the Building Regulations state that you must use insulation that is at least 100mm thick. For retrofit applications, you can use 50mm thick insulation.
2. Choose a central, easy-to-access location for the manifold
The placement of the manifold is a crucial element of any UFH system, and it is highly recommended that it is placed in a central location in the home for the following reasons:
- Firstly, by positioning the manifold in the centre of the house, you can limit the chances of running pipe circuits across multiple rooms. This means that the overall length of pipework is reduced, helping save installation time and material costs.
- Secondly, reducing the lengths of pipework increases energy efficiency, as the water does not need to run through multiple zones to reach its intended destination. This also reduces the possibility of heat transfer into zones that do not need to be heated.
For future servicing and maintenance, the manifold should also be placed in an easy-to-access area.
3. Familiarise yourself with the manufacturers’ instructions
This may seem a little obvious, however, reading the manufacturers’ instructions thoroughly before starting the underfloor heating installation is a good starting point as it contains detailed installation guidance. For example, following the instructions that come along with the manifolds could save you from time-consuming rework later down the line.
With our JG Underfloor Heating systems, every manifold is packed with a step-by-step installation guide to show you how to install the pipe runs, how to lay the pipe and how to commission the system to ensure a successful installation.

4. Fit the manifold first, not the pipework
A common issue during underfloor heating installation is when the pipework is installed before the manifold. Doing this can result in pipes getting entangled while connecting to the manifold.
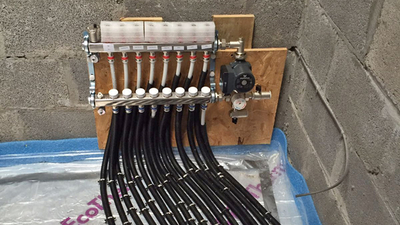
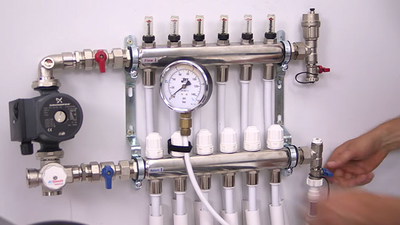
The best practice is to fit the manifold first, and then route one circuit at a time from the manifold’s flow to return. It is also important to mark each circuit on the manifold, so that in future it is easy to identify which circuit goes into which room or zone. We supply stickers with our JG Underfloor manifolds which can be used to label the pipework for easy identification.
5. Label flow and return pipework from the boiler
Labelling the flow and return pipework from the boiler is another very important step when doing an underfloor heating installation and one that is often missed.
If the flow and return is not connected properly on the manifold, i.e. the flow pipe is fitted to the return network and vice versa, it can result in an inefficient heating system.
While the manifold will still be able to blend the water, it will not be able to do it as intended. This means that the water will not reach the zones at the correct temperature, and you will not have any control over how the manifold runs.
6. Fill the system carefully and avoid airlocks
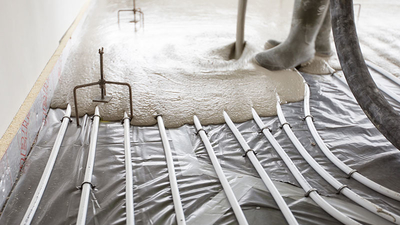
Once the pipes have been laid, you will need to fill the system with water and pressure test the pipework before laying screed. So, while flushing through with a hose pipe, it is important to check that there are no air bubbles.
There are a few important tips here. The first is to fill one circuit at a time – if you try to fill all the circuits at once, you can end up with air bubbles that can greatly impact the performance of the UFH system. Airlocks can stop the system from circulating, or air bubbles can reduce water mass within the pipework, meaning less heat will be transmitted in the floor space.
Another tip is to fit an Auto Air Vent (AAV) to the manifold to help purge the air out of the system, and also prevent air from building up in the system at a later date. JG Underfloor Heating manifolds come pre-installed with an AAV, so you don’t need to worry about installing one separately. But, if you purchase a manifold without an AAV, we recommend fitting them at the highest point on the manifold.
Post installation, plumbing and heating engineers should also advise customers to maintain UFH like any other central heating system and regularly flush the system every 1-2 years to prevent air from building up in the system.
7. Always pressure test the pipework before laying screed
As mentioned previously, you will need to pressure test the pipework before laying screed. This is to check for leaks in the system before the screed and flooring goes down.
A foolproof way to do this is:
- Pressure test at 2 bar for 10 minutes, check for leaks.
- If there is no problem, then test the system at 10 bar for a further 10 minutes.
- If there are no leaks after that, then leave the system pressurised, but reduce the pressure to between 3-5 bar until the screed goes down.
- Once screed is laid, then the pressure can be reduced to the working pressure which is typically between 1-2 bar.
8. Add anti-freeze for a winter installation
If the underfloor heating installation is over the winter months, whether it’s new-build or retrofit, the water left in the pipes can potentially freeze if the pipework is left in the cold. This can weaken the pipe, and cause it to split, either immediately, or worse, at a later date when the flooring has been laid.
To prevent this, add some antifreeze solution to the water while pressurising the system. When the project is complete, the water can be flushed out and replaced with normal water.
9. Don’t shock the screed
A final point to bear in mind is that you should never let the screed to crack by heating up the system too quickly on the initial run, which is sometimes known as ‘shocking’ the screed.
Ideally, ensure that the screed has been cured before heating the system. Then, gradually build up the heat, start at 25°C and keep adding 5°C every day until the water comes up to the desired temperature.
UFH is the most energy-efficient and comfortable way to heat up a home, but for the system to be effective, you need to ensure that it has been installed correctly. At RWC, our CAD design team and technical experts can help you plan and execute your next project from start to finish. Click here to get in touch with us.
